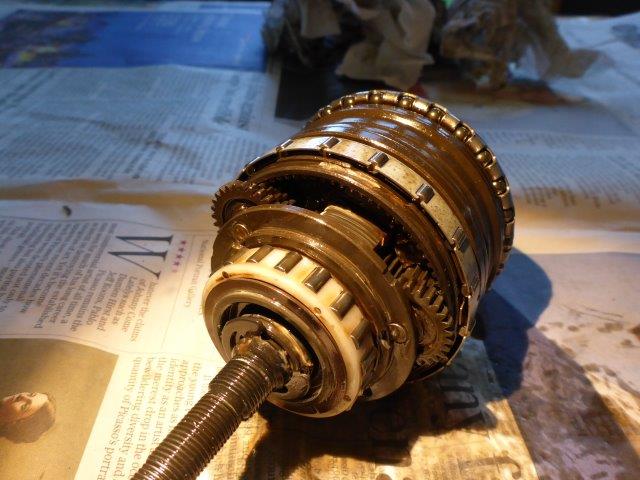
Shimano Hub Gear Innards
I have been cycle-commuting since 1992, variously on a Dawes Galaxy (touring bike) 1992-2002, Trice XLNT recumbent tricycle 2002-2006, and a Halfords Carrera Subway 8 2006-2024. (Up until about 2004 I didn't have access to a car at all and the Galaxy was my primary utility transport.) Of all those, the cheapest and the best for utility use was the Subway - it has hub gears and brakes, using the Shimano Nexus range of componentry. For a commuter / utility bike, I think hub gears (and to a lesser extent brakes) is the best setup.
I've never had a very long commute. My annual commuting mileage has varied between about 3000 miles/year and (now) only about 1000 miles/year (I mostly work from home these days).
This is some notes about my experiences with hub gears on the Subway.
Some shortcuts to other pages:
the first hub post-mortem
the second hub, design changes and first year unmodified
planning and installing an oil port in the second hub
hub condition a year later (2 years old, 5,000 miles)
hub condition at eight years old (20,000 miles)
hub condition at 15 years old (31,000 miles)
how to open one up and dismantle it
As an aside, I observe that I've been using the same Brookes B17
saddle since the mid 1990s. I reckon it did about 30,000 miles on the
Galaxy and 36,000 on the Subway, so as at early 2024 it has done equivalent to about
22/3 times round the equator.
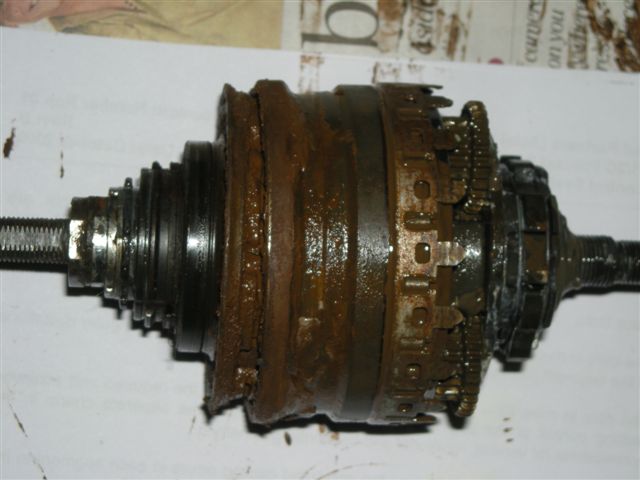
The rusty hub
My first hub gear only lasted two years before failing catastrophically. Before it failed, it was running rough and dismantling it after failure it was evident that it had let water inside and there was lots of corrosion. It's not a pretty sight, but the full detail (and nasty pictures) is listed on another page.
Amusingly (or not), it actually lasted less than one month over two years -
I collected the bike on 21 October 2006 and the hub seized solid on
19 November 2008. The hub had a two year guarantee. Hmmmm.
Yes I
know that fitness for purpose is not constrained by guarantee periods. No
I couldn't face the hassle of arguing about it with either Shimano or
Halfords.
I've since heard from several owners of this specific model of hub that theirs has done likewise. I think there is a design fault with the seals. Other superficially similar models don't seem to suffer.
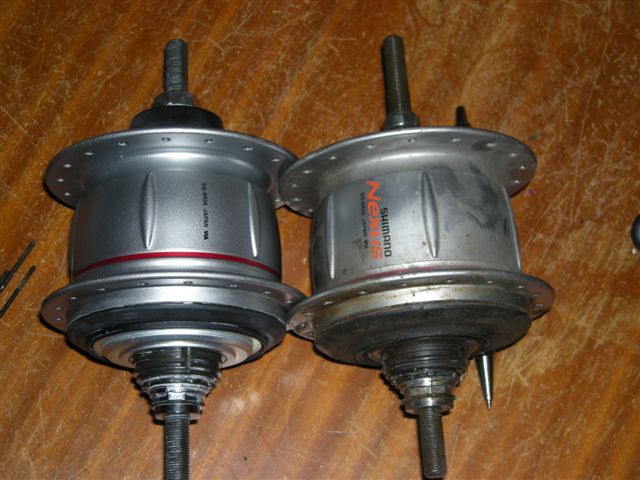
The new hub
So, I bought a new hub.
The two hubs are externally pretty similar. Both are 'premium' Nexus 8. The older one was a SG-8R25, the new an SG-8R36. Functionally, the new one has a 'silent clutch' rather than a ratchet freewheel, but otherwise they are both 8 speed, roller brake compatible, and use the same shifter and connector.
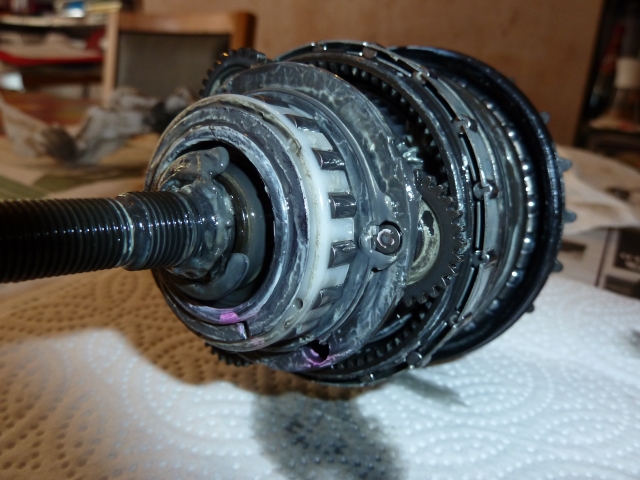
I ran the new hub in its standard configuration for about a year, and there's a page about the design changes and how the new hub performed during that time, including what the innards looked like at the end of it.
The Oil-Port Modification
I then fitted the oil port I first thought about when the new hub was brand new. There's a whole page about the planning and implementation of that. Given how well the new hub is doing, I'm not sure it's needed, but I decided it probably wouldn't hurt.
Long-Term Performance
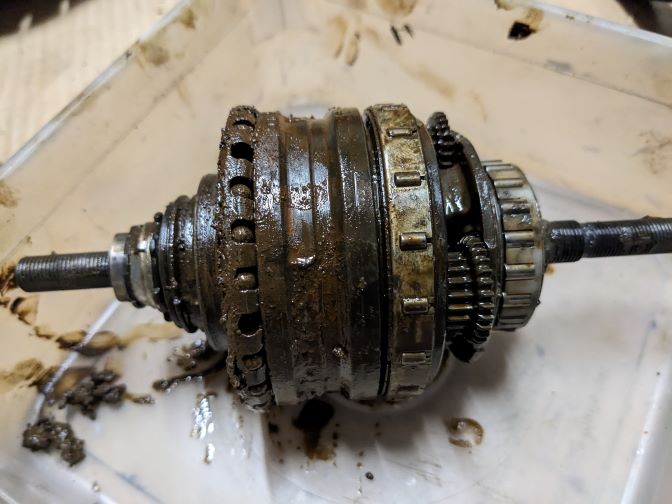
There's a page about the performance a year after the oil port was fitted, when the hub is was almost two years old.
(Compare this with the picture at the top of the page - both mechanisms are about the same age. What's glistening wet in that picture is water, what's glistening wet here is oil.)
A page about the condition after eight years of use.
A page about the condition after 15 years of use, at which point it is end of life, but only due to one part (it's not as bad as it looks, generally).
Dismantling
Obviously, I've dismantled my hubs several times. It's actually relatively easy to get into one of these hubs, and there's a page about how to open them up (and put them back together). If you don't want to modify the hub, you can re-lubricate with the same oil by dipping it, but you still need to open it up to do that.